Dec 7, 2010

personal values portrait project

so, sometimes you have an entire project planned for the end of the semester for your students only to find out that you neglected to book the lab enough days.  after pleading with your media specialist you find that the computer situation will remain hopeless - as everyone and their brother is using the computer lab to schedule end of course exams.  so, you have 24 hours to figure out an alternative project for their remaining 6 class periods (one of which will be spent painting their ceramic portraits).  what do you do?

after much deliberation it hits you - 'lil wheezy!


okay, so maybe it didn't happen like that.  my students had just finished up some play with color so i thought portraits would be a good segway.  unfortunately we don't have time for a large unit.  so, i thought students could grid off their own photographs and concentrate on painting the values.  to play with the theme of values i thought students could imbed their own values into their finished pieces.  i can't take full credit for the lesson plan, the middle school project i saw on the incredible art department website was a great sparker.

example assignment with embedded values

So I set forth to design something which incorporated the formal element of values, the identity component of portraiture, and the conceptual connection of values.  Because I knew I know I'll have to take students photos tomorrow (in order to have time to print them, etc) and I knew they'd need some practice (despite our lack of remaining class time) I decided to create a couple of "paint by number" examples using celebrity portraits.  Initially the plan was just to use Mona Lisa, then I thought mixing in some pop culture examples would be more fun.  Here's who I came up with.


To get to this point I imported each image into photoshop, converted them to grayscale, then colorized them under the adjustments settings (I wanted students to work mostly monochromatically).  After I did this initial processing I cropped the images into square compositions (because I like them) and then did a little cutout filter magic.


After this I thought I'd make a coloring book version template for the students by tracing the main features of the images and having them paint on top of the worksheet.  This, however, didn't turn out so hot as my drawings looked awful and I knew they would not escape the relentless scrutiny of my high school students.  So, I decided to do something crazy - why not paint directly on the photograph?


This was my first attempt - about 5 x 5 in size.  Entirely wayyy to small.  I decided to try and work bigger and to begin by printing off a copy of the photograph with a very low opacity (so that it was very translucent).  Here's how it progressed:


Ok, so, maybe his tattoos look a little like chocolate drips - but i wanted it to be really expressionistic.  Guess I won't escape teasing after all.

... wish me luck!

Nov 23, 2010

my first website - for reals.

so, i finally made a "for real" website.  click on the image below to visit melissamudd.com.  woot!

Nov 19, 2010

progress!

2 hours in the studio this evening...


working with these intense primaries is a bit more challenging than I'd imagined.  There's a lot of weird simultaneous contrast happening between the teal and the yellow.  Many areas will need additional coats.

... i think i can i think i can i think i can ...

Nov 18, 2010

creative confessions

Creating artwork has been a fight for me the last year or so.  I wouldn't say creation itself has been an issue - as it seems like I'm always piddling around with something.  More often than not it is in the form of something home decor related - scouring antique malls for the perfect something for this display, or that wall.  I obsessively bookmark ideas for what I like to call "crafties" - those "hey I could do that" moment on etsy of interesting scarves, cool throw pillows, diy jewelry, etc.  I feel like I'm always scouring every nook and cranny for ideas and seeing potential in even the most mundane of things - I'm just not so hot on the whole "follow through" thing.

Here are some of my most common creative "roadblocks" -
  1. Getting lost in the ritual - whether it be endlessly searching/gathering things (as described above) for use in a piece "someday" or putting off beginning work because I feel I have to start with a clean studio.
  2. Questioning myself - Is this really going to be any good?  Is this too crafty, too academic, too personal, too cliche, etc. etc.  I am always doubting the intention of the work.  Creating a series of work and/or attempting to answer the "who am I" as an artist is often debilitating.
  3. Explorama - I am interested in trying out so many ideas or materials that I become easily overwhelmed - and end up with countless "false starts" or heaps of barely used supplies.
The following is a narration of this case in point.

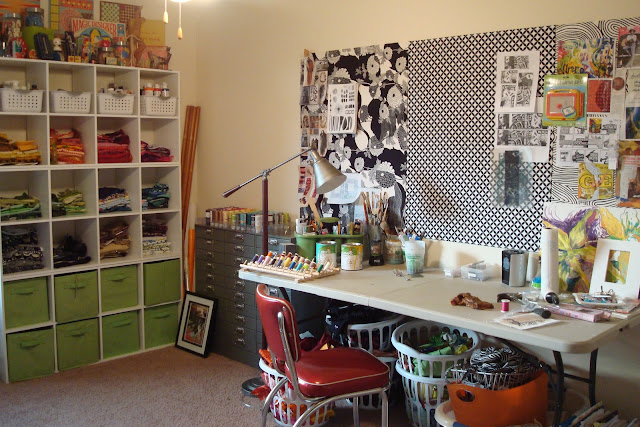
my (mostly clean) studio
This is my studio.  I take great pride in organizing and reorganizing it - generally to the detriment of actually creating anything substantial.  Last weekend when I had finally committed to a painting instead of working on it I ended up spending most of my time cleaning :(  Does this happen to anyone else?

So - the piece I wanted to paint - that's another issue in and of itself.  Here's how that story goes:


small printed fiber piece - in progress
This is a small fiber piece I have been playing around with.  I have been creating digital paintings on photoshop for awhile and on a whim (LAST SPRING) I stumbled upon the realization that I could actually print directly on fabric using my $40 ink-jet printer.  No special sheets, no bubble jet set, no freezer paper funny business - just cotton taped on all 4 sides to a piece of printer paper fed through an inkjet.  Cool huh?  Despite my knowledge of this (and my initial reaction on how revolutionary it would be for my work) I have made only 3 - count them - THREE - pieces using this method.  

stitched detail - a good start, but a long way to go still
This one was the most recent playing with some imagery I scoured from old magazines, patterns painted with custom photoshop brushes, and some rudimentary stitching.  My plan is to go back in and embroider parts of this, but who knows.  The scale seems to bother me a bit - I feel like I don't take things seriously unless they are large pieces, instead of the peasly 9 x 4 this little guy is (silly I know!)  I am dissatisfied and already moving on to the next thing...

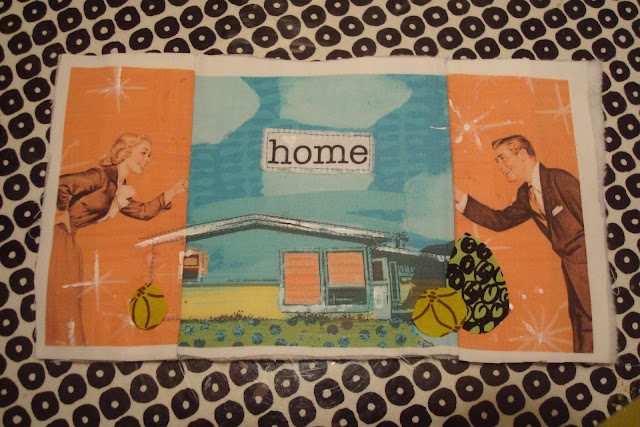
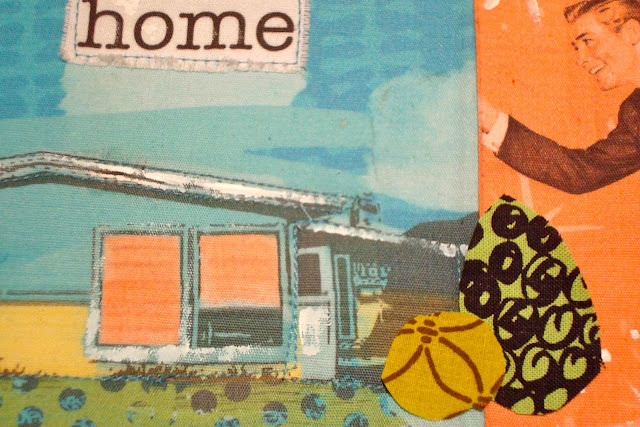
collage mess playing with mirror image technique
Here is the next thing.  I spent 3 hours going through my stash of old magazine images and photocopying (and mirror imaging in photoshop) several examples I liked.  I then began cutting them out and arranging them in this composition.  That got me thinking about...

digital idea sketch for a new painting - in progress
... these possibilities.  I began considering what these images might look like as part of triptych painting.  Another detour I've been looking at lately is vintage color by number works (love their kitschy glory).  I photoshopped some cloud images to have that color by number feel (using the cutout filter) and have used them as part of the background.  The two figures (originally from a Lucky Strike ad) I think have such a wonderful framing gesture.  The triptych format and the contents (especially arranged in this mirror image fashion) reminded me a lot of old altarpieces.


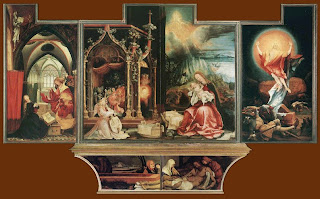
Matthias Grünewald's Isenheim Altarpiece (1500s)


But...  I'm not sure if I'll claim that symbolism, but perhaps the nod.  I do like the idea of using all of these images of this ideal advertised life in an almost religious way.  So here are more peeks...

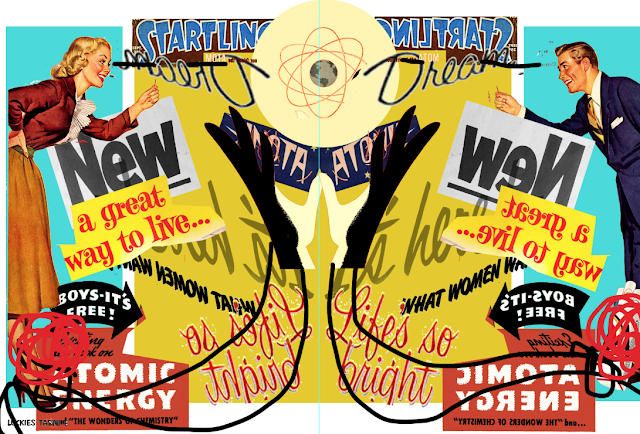
digital sketch with text experimentation


Further exploration led me to start thinking about incorporating text.  Here are a few of my ideas.  Shockingly, this propelled me enough to finally get my butt to the store and get started on this bad boy.  Here are a few images of the work in progress:

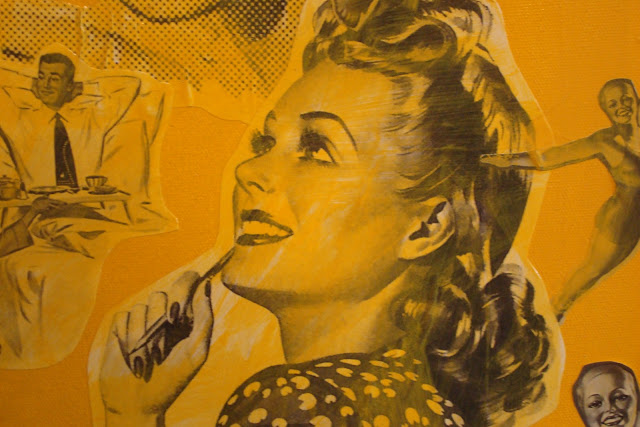
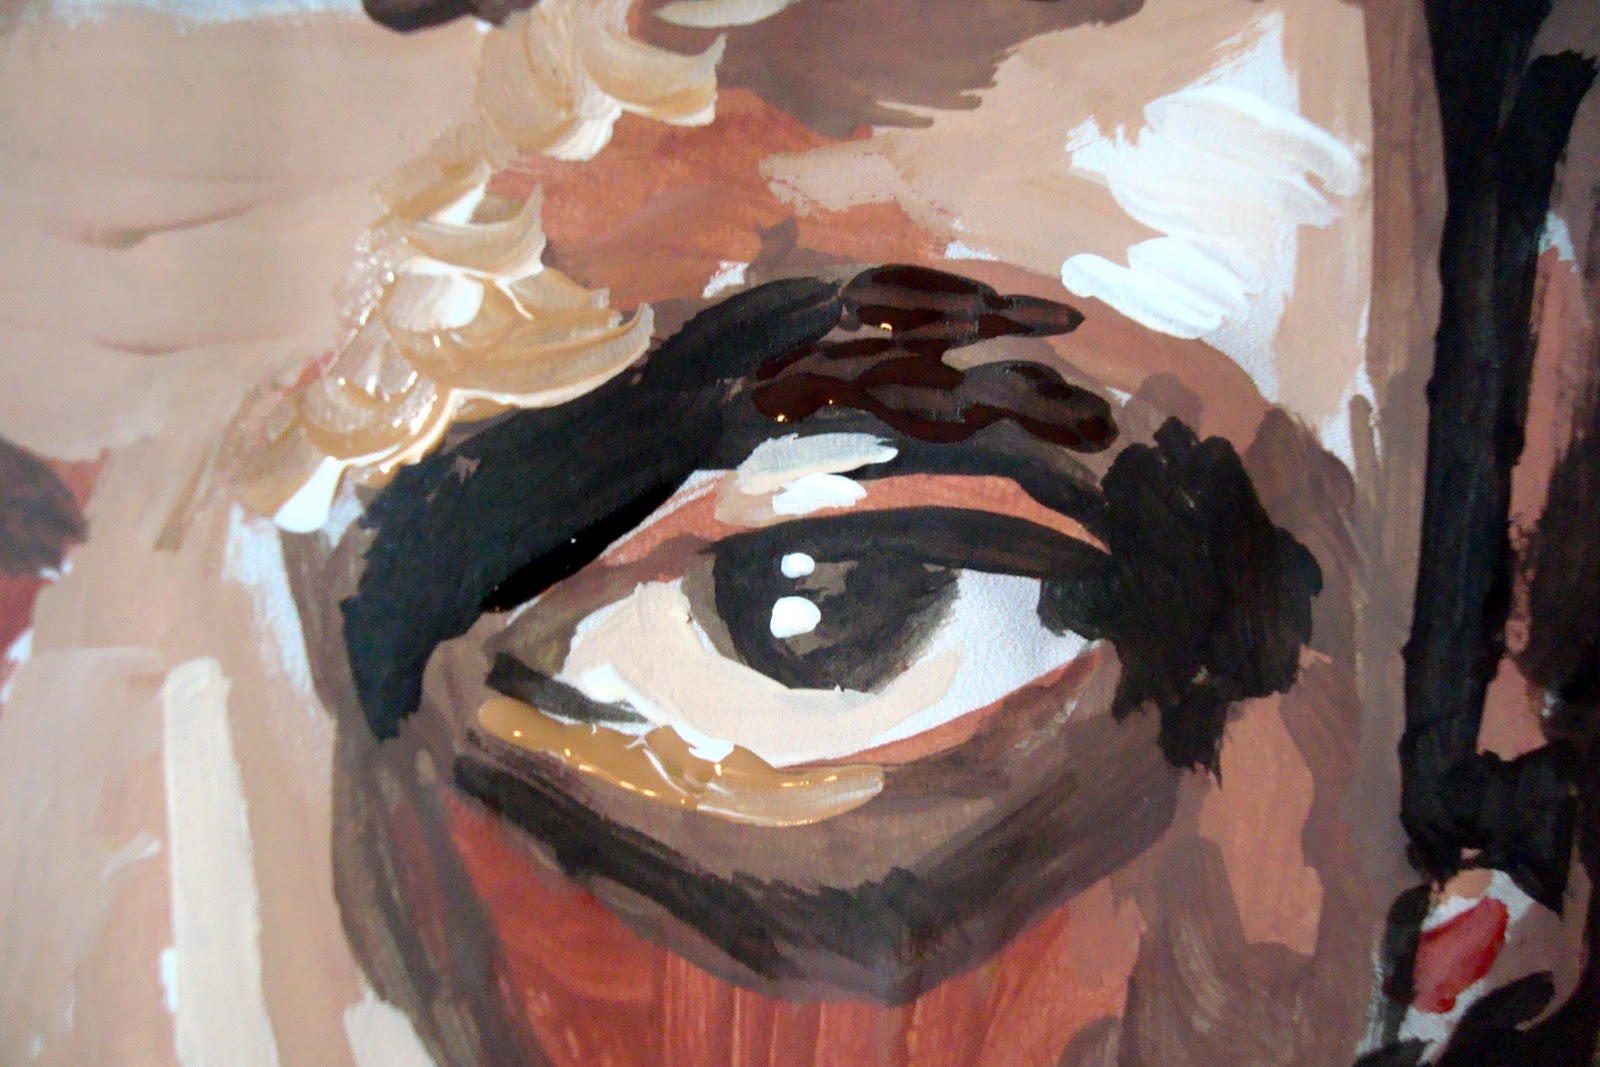
collage detail - I tried glazing with gloss medium and latex
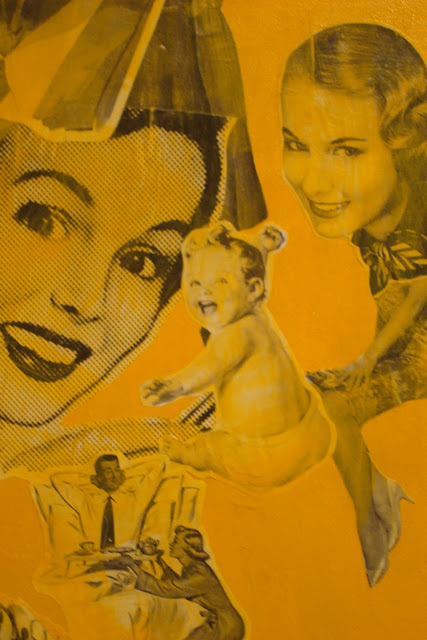
the paper is bubbling more than I'd like in a few areas so I'm considering a resin coating over the whole piece
(but is this a stall tactic for actually completing the work? hmmmmm....)

So, this is where I'm going to leave it right now - a 5 ft by 3 ft teal and butterscotch question mark.  I'll keep you updated on my progress.  Hopefully I don't fall back on my usual ways :(

Oct 11, 2010

visioning drawing project

For the last several weeks I've been envisioning a new project for my Basics students centered around the idea of them creating a visioning image.  Vision boards (made popular by self help gurus and books/films such as the secret) are a collection of powerful images and words which help you visualize your goals for the future.  An example can be seen below.

Vision board example
As my students have been working so much with technology to collage I thought it would be a good idea to get them psychically involved i the process of collage.  Last week I had them begin constructing their own vision boards based off of one of two prompts 1) "imagine you are looking back on your life when you are 80 years old - what moments, accomplishments, etc will stick out?" or 2) "create a collage which describes how you envision your future life."  These collages will serve as part of the background layer for their talisman drawings.

As cheesy as it might be, part of what makes the visioning process powerful is that by articulating what you want you are also becoming more cognizant of these goals.  In this spirit I thought that constructing a vision board layered with maps (metaphoric for life's journey), the students' vision collages, and their own handwriting would not only be beautiful but very meaningful.  On top of these layers students will be collaging a beautifully rendered drawing of a personal talisman which is symbolic of the hopes and dreams they wish to achieve.

To visualize this process (and the final result) I've constructed two digital mock ups of what I think these collages could potentially look like.  The drawings in the middle are not my own, but I think they are good examples of well-crafted singular objects drawn on toned paper.  You can click on the images for a larger view.


Additionally, I would like for students to complete some reflective writing that is included within the piece. I haven't decided on the prompt yet - but I think it will be a nice addition.  Thus far I am thinking these will be collaged onto canvas panel in between layers of tissue and paint washes.  I think this could be a great way to get students interested in collage and physical layering as well as drawing (without the intimidation of having to draw an entire still life).  I'm pretty pumped - I hope they are too!  I'll keep you posted!

PS - Though I can't find better pics here are a few examples of the layering process as I've experimented with it before (winter 2008).  These were frames I found at Michaels that I collaged/painted to display photographs printed on organza of my late grandfather.  I'll have to see if I can get a hold of the originals to show my students.

this photo shows the process - lots of collage bits torn and layered

the finished piece - many layers of paper, cloth, photos, paint, inks, and leafing.  Miss him horribly :(

Sep 13, 2010

voice thread embedding

I have blog fever and the only cure is more cowbell.

I have spent the last couple of days reading my students' blogs and have become really inspired to get in on the posting myself.  So... here goes!

This weekend I finished the final touches on my teaching exemplars for a project my art basics students are doing. The class (which centers around the big idea of identity) has been playing with expressive mark making, doing analog drawings, and learning how to work artfully in photoshop. The culminating project (guidelines which can be viewed here) is for them to produce an accordion fold artists book which ties in with the big theme of identity as well as a mini-theme - suggestions include internal vs. external, public vs. private, society vs. personal, etc.  I thought this fit perfectly with the idea of a book as a book has multiple dimensions (the cover equaling external and the pages equaling internal).

Here are some photos of my process and the (nearly completed :) exemplar

some of my process sketches - seems like i never actually sketch in my "sketch" book

the dual-sided 4 panel option - side one

the dual sided 4 panel option - side two

the eight panel option - single sided

and again.. with flash this time (thought the reflection on my desktop was cool)

and another detail shot